Gadgets are really important in both Rainbow Six Siege and Rainbow Six Extraction. However, in Extraction, gadgets have been modified so these can be more deadly and useful in your incursions.
Rainbow Six Extraction REACT Gadgets
There are 20 different REACT gadgets in Extraction, so it's understandable that you struggle at deciding which are good, and which aren't that good.
These are divided into Tech Tiers, from 1 to 5. Tier 0 includes the Smoke Grenade and the Drone, which are unlocked from the start of the game. From there, you will have to unlock the rest by completing missions and objectives.
Tech Tier 0
Smoke Grenade

The Smoke Grenade is a very useful tool, especially in the early stages of the game. The smoke disorients Archaeans so you can perform takedowns as if you were stealing candy from a baby.
It is very easy to deploy, although it detonates 2.5-seconds after throwing it — which makes it almost useless in some situations. The smoke stands in the area for 15 seconds.
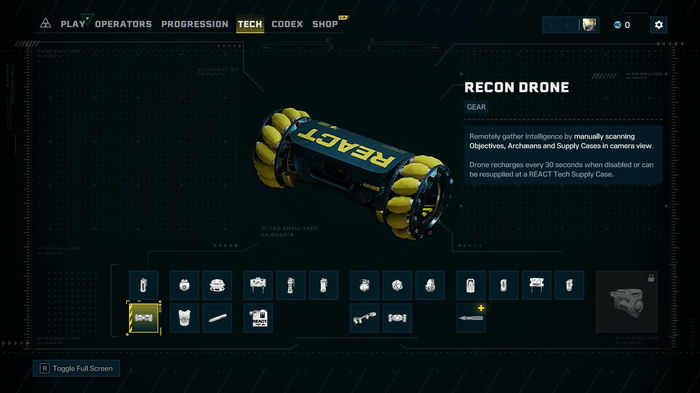
Drone

If you have played Siege before, this important gadget is no mystery. Drones are used to gather information on where Archaeans or nests are located.
However, there's a catch. In Extraction — unlike in Siege — drones have batteries. This means that you can't spend much time droning, so watch out.
Tech Tier 1
Impact Grenade

This might be a game-changer. The difference between the impact grenade and other REACT gadgets is that impacts detonate once they touch any surface in the game. This means you can instantly get rid of nests, open soft walls, kill or knock back Archaeans — or deliver a great amount of damage to any opponent.
We could say impact grenades have a huge impact in any imaginable situation in Extraction.
Revive Kit

If impacts are a game-changer, the revive kit is a life-saver. If you're downed (DBNO) on the battlefield, you will be able to revive yourself one time.
This will always be a useful gadget, but it is essential if you play solo. You will be able to stand up and run to the extraction point to avoid your operator going MIA.
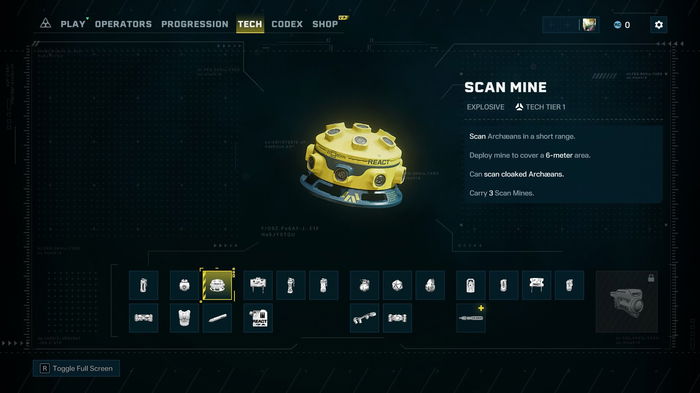
Scan Mine

The scan mine scans anything that's in a 6-meter area. To be fair, its impact isn't as big as the previous two options, but it isn't obsolete by any means. Depending on the missions you have ahead, the scan mine can be really useful.
Body Armor

Last but not least in this category, we have body armor. This will reduce any damage by 20%, and you will lose it once you're downed.
Tech Tier 2
Stun Grenade

The stun grenade has a similar impact to its sister, the smoke grenade. I personally prefer the smokes, but go ahead with this option if you prefer burning the Archaeans' eyes.
Just as the smokes, the stuns detonate 2.5-seconds after the impact.
Claymore

If you're a regular FPS enjoyer, a claymore won't surprise you. Claymores aren't useless in Extraction, but they aren't the best option either. You can use these in missions such as Sabotage, where you must protect an arch spine.
Glue Grenade

The Glue Grenade slows down Archaeans within an area of 10 meters. Archaeans are covered in a yellowish material which makes them way slower. It can help you run from your enemies, or you can take advantage and kill them there.
Ammo Satchel

In Extraction, you will rarely find yourself in a situation without ammo. There are many ammo boxes around the maps, so you should be fine.
You can always bring extra ammo with the ammo satchel, but with so much of it in the maps, this gadget is almost obsolete. Our advice is that you use this space with something else that you think will complement your kit.
Tech Tier 3
Field Wall

The Field Wall is very useful when facing Tormentors, who shoot you with glowing projectiles. When you deploy a Field Wall, this will block all incoming Archaean projectiles... but it doesn't block friendly fire. This means that you can shoot from behind a Field Wall and still be protected from enemy projectiles — a very useful gadget in some situations.
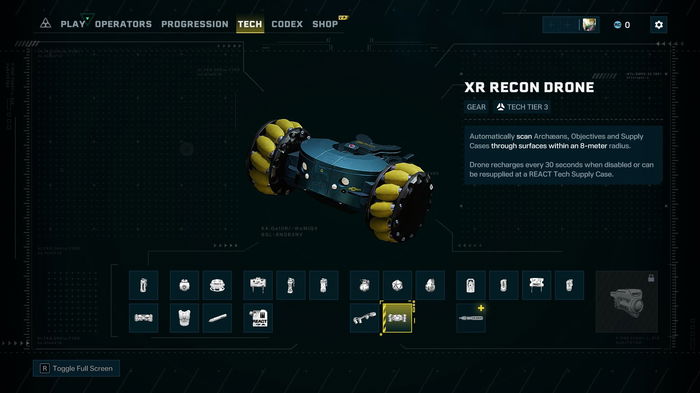
XR Recon Drone

REACT Drone's big brother, this drone can spot objectives, Archaeans, and supply cases through surfaces within an 8-meter radius. It also has a battery, so you will have to pay attention to that.
Explosive Harness

With the explosive harness, you will be able to carry with you more explosive gadgets. Considering the number of supply cases in each map, bringing the explosive harness might be a bit useless. But you do you.
Fragmentation Grenade

The Fragmentation Grenade has little difference to Siege's version of it — the fuse time is four seconds shorter than in Siege. Have that in mind before cooking it.
Scan Grenade

There's no mystery behind this gadget. As the name says, this grenade scans an area on the map. It scans various types of Archaeans, and objectives, in a 12-meter area for 30 seconds.
Tech Tier 4
Anabolic Accelerant

The Anabolic Accelerant will boost your health up to a maximum of 50. This is very useful to get the best out of your health.
Arc Mine

The Arc Mine is the evolution of the standard Claymore. You can place it on the floor, up to two Arc Mines, which will shoot at targets within seven meters.
Nitro Cell

Nitro Cells — also known as C4's — are a very used tool in Siege defenses. Pre-placing a C4 in Siege is one of the coolest tactics in Siege, especially if you combine it with intel operators such as Pulse, Valkyrie, Echo, or even Mozzie.
In Extraction, the C4 has another role. Yes, it explodes, obviously. You can pre-place the C4's and detonate them whenever you want to.
Paralysis Grenade

The Paralysis Grenade paralyzes Archaeans temporarily. Just like the Impact Grenades, this tool detonates immediately. It stops Archaeans for five seconds within a small area, it is your job to make the best out of this gadget. Combine it with operators and your teammates to eliminate as many Archaeans as you can.
Recon Vapor

This gadget is very useful as it scans an area for 45 seconds. It doesn't detonate instantly, but when it does, you will be able to scan all Archaeans within the vapor. This will give you and your teammates a huge advantage in certain situations.
Tech Tier 5
REACT Laser

Last, but definitely not least, is the REACT Laser. You will be able to unlock this tool once you reach level 25. It is a very useful gadget, as it quickly deintegrates the sprawl once you aim towards it. No more shooting or meleeing the sprawl. Those days are over.
This tool will be automatically equipped in all of your weapons and you will have the power to switch between the REACT Laser and the REACT UV Light, which is the tool that lets you see enemies through destructible walls.
Which gadgets are best in Rainow Six Extraction?
It is difficult to choose from a 20-items list, but here you have some pieces of advice. Take this into account before choosing:
- Look at the missions you will have to complete: Your needs will change depending on the mission you have to complete. If you're heading to an MIA Extraction, an operator like Lion might be helpful to detect Archaeans while you're saving your teammate.
- Talk with your teammates and see what they are bringing: It is good to combine gadgets with your teammates. Impacts can be combined with a Field Wall, for example. Someone can bring Body Armor too.
Now, go to the battlefield and try to get the best out of the new REACT Gadgets!